Thursday, April 11, 2013

Wide Ruffle Curtains

I recently undertook the project of making ruffled curtains I saw on the blog A Boy A Girl & A Pug. I took their basic ideas, but I needed wider and longer curtains, and wanted satin ruffles so I did deviate a bit.

I used two king flat sheets from Target for $18.99 each (I didn't use Walmart's because their measurements said they were a couple inches smaller, but if that doesn't matter to you my local Walmart's had them for a couple bucks cheaper.) Here is a link to the Target Flat Sheets.

I used 118" Ivory Satin for the ruffles that I got from WarehouseFabrics for $8.98 per yard (They have other colors as well, just search their satins). If you are wanting to do larger curtains like mine, I would recommend getting about 7-8 yards depending on how many ruffles you want.

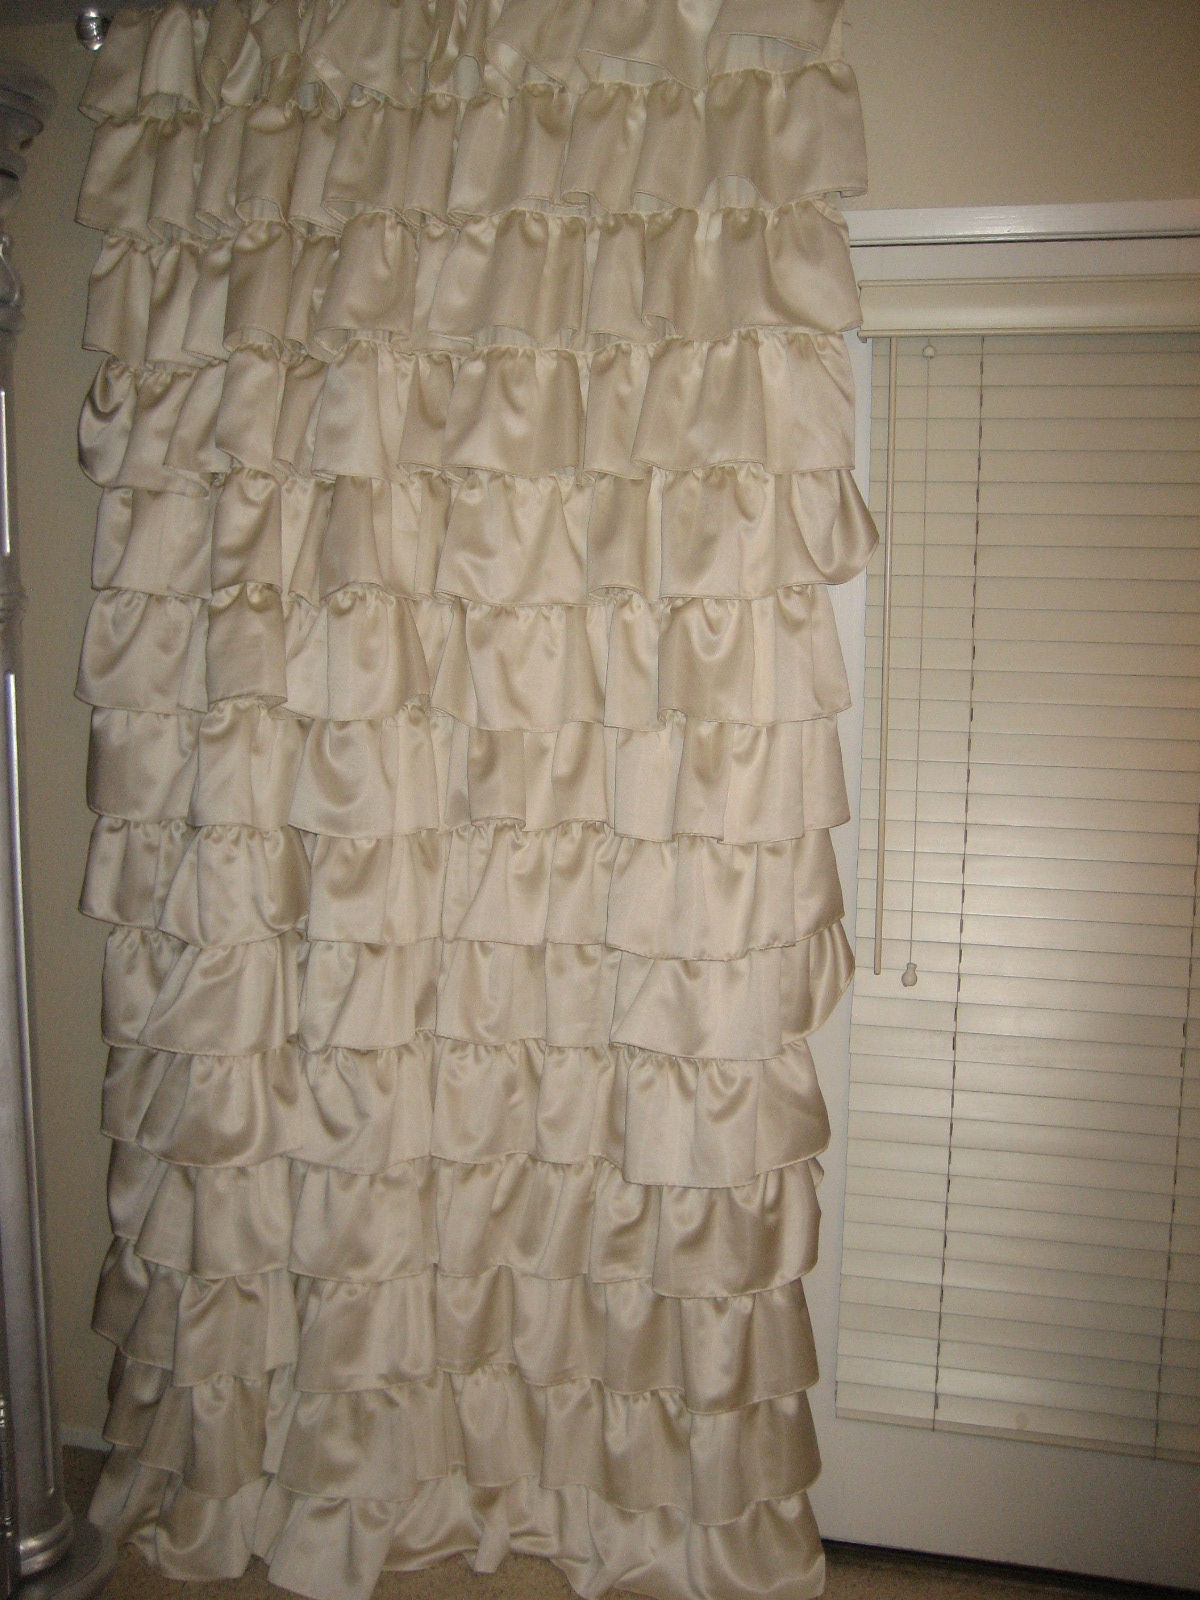
I had some scrap satin fabric that I tested and I found that I liked 8" wide ruffled strips the best. They did 12" wide strips on A Boy A Girl & A Pug, but I found it didn't bring out the ruffles enough when I did them that long. If you go with the 8" length, I would suggest doing at least 16 ruffles per panel. If you are using the minimum amount of ruffles, you only have to barely overlap the first half, but then you need to gradually have each new ruffle cover the next ruffle more as you go up so you don't see the backing sheet. (So while one of the bottom ruffles may just skim over the top of the ruffle it is covering, the very top of mine covers about 4 1/2" of the ruffle below it.) I will try to put my exact measurements for graduating the top 8 ruffles on here soon.

When hemming them, I didn't pin them or try to make the hems absolutely perfect, I just turned a little bit over and put it under the foot, put the foot down, and then folded it the same amount to the edge of the sewing machine or the edge of the table. Here are pictures:


Just hold that down while you sew straight until your finger meets the foot, stop sewing and fold the fabric again (don't lift the foot, the only time you do anything with the foot is at the beginning and end) and sew. Repeat until you get to the end. Don't forget to backstitch at the beginning and end :). This is just how I did it, if you have an easier way, go for it!

Another way I did things differently than BAG&P blog was that instead of basting and hand ruffling, I used a ruffler. I think this probably saved me a lot of time. It looks like this:
I used the number 6 setting, and set the orange dial to number 4. This is important because this will determine how often your ruffles will be gathered or, basically, how ruffled your ruffles will be. I tested this and this was the right combination for the king size sheets and the 118" length of the satin so the ruffles weren't too short. Now they did end up a little long, but this is fine, when you are pinning your ruffles on to the sheet just tuck the excess length behind and use your front pin to hold that to the back so when you are sewing it will just be sewn right onto the back while you are sewing your ruffles onto the front, easy peasy (if you have or get a different ruffler just test the settings using some scrap fabric to see which setting will get you the right length for your fabric. You don't have to do the full 118" either, just measure a set amount of inches, like 20" and see how much it ends up being after ruffling, you can then just do the calculations to see how much it would take off of 118"). Now the ruffler says it is capable of ruffling and sewing onto another piece of fabric. I tried this on scrap fabric and on the second row it missed huge gaps of the backing fabric, so I wouldn't try to take that short cut.

I also used blackout fabric in back. I had to use to piece per panel since they are so long. I cut them to the size of the sheet and sewed them together in the middle (if you are worried about pinpricks of light coming through if you have no blinds, just glue an extra piece using fabric glue over the part you sewed). I then sewed it at the very top, and at several places between the ruffles on each side (two places in the middle and at the bottom).

If you want to do this project too, I would highly recommend checking out A Boy A Girl & A Pug for their tips as well!

And here is the finished product!


Feel free to ask any questions, I would be happy to help if I can!


Wednesday, February 13, 2013

DIY Ruffle Coverlet

First of all, I am still pretty new to sewing. I started about a month ago, but I have thrown myself into it. I may not have done things exactly the way the pro's may have (this involved some guessing on my part), but it worked!

I wanted to have ruffles on the edges on the coverlet I bought:
I LOVE this coverlet and if you like it you can find one on ebay:

http://www.ebay.comhttp://www.ebay.com/itm/321106034290

Or you can use a coverlet of your choosing.

Now, I bought a ruffler foot and 2mm hemmer foot so I could actually make all the ruffles myself, but since I am still so new to this I got overwhelmed by the sheer magnitude of how many ruffles I would have to make, not to mention how much material I would need since I have a king size bed. So I cheated.
I bought this bedskirt from walmart for $38, although the price has gone up to $45 now for a king.  You can do a pick up in store or free delivery since it is $45.
http://www.walmart.com/ip/Multi-Ruffle-Bed-Skirt/19888372

Or if you buy from Wayfair through Walmart the price is $31+$8.97 so that is now the better deal
http://www.walmart.com/ip/Greenland-Home-Fashions-Multi-Ruffle-Bedskirt/20519563?findingMethod=Recommendation:wm:RecentlyViewedItems

I cut the top part of the bedskirt that goes over the mattress (being careful not to cut the seams) and left the ruffles.

I then had a long strip of ruffles. Hold a section up to your coverlet to see how far past your coverlet edge (if at all) you want your ruffles to fall. I chose to have my ruffles longer than my coverlet, so they were about 9 1/2" from the edge of the coverlet on the two sides. The bottom measurement varied slightly. Make sure to measure from the edge of your coverlet when you have found where you want your ruffles to start.

I found it best to lay out your coverlet flat on the floor for marking and pinning. You need a ruler and  a chalk pen to mark where you are going to pin your ruffles, marking about a hands width apart. A yardstick is great to so you can make sure you're marks are fairly straight (remember they may not be be absolutely straight since your coverlet may not be completely straight on the floor, so don't stress if there is a tiny difference, the yardstick is mostly just to make sure you didn't accidentally make a wrong mark).

I found marking and pinning the two sides first better and then seeing what measurement the fabric naturally wanted to be on the bottom.

After you have pinned all your fabric you might want to put it on your bed to make sure all the ruffles have been pinned right. If all looks good, head to the sewing machine!

I have a Janome DC2012 sewing machine, and decided to use the Even feed walking foot, since it was supposed to be the best foot (or the best foot I had) for thicker material. It looks like this:
Now this part was some work. Since the fabric is heavy I had to help pull the fabric out the back of the foot and of course guide it in front to keep it straight. Make sure your extra ruffles and fabric are all pulled to the right so they don't jam the machine. Of course make sure to backstitch at the beginning and end a your sewing, but you guys already know this.

After I had sewed it all (and yes, resewed a couple little spots), I pressed the seams and threw it in the wash (and yes, I'm a germaphobe), and put it on my bed. And here it is!

You can have just the coverlet...


 Or add a duvet!


Stay tuned for how I built my own cutting/storage table! :)